
Are you like me and have zero decorations for the 4th of July? I decided it was time to change that this year because I finally have a few places I can put them up. Hooray! I also needed one more thing in my house to dust every week.
I began looking for something fun to create or do and I stumbled upon this already cut out wood flag from the local Wood Connection store. Have you ever been? It's far to much fun in there and you need about a million dollars every time you walk in. So, because our family is trying to save some money, I had to limit myself to just one thing. I settled for this!
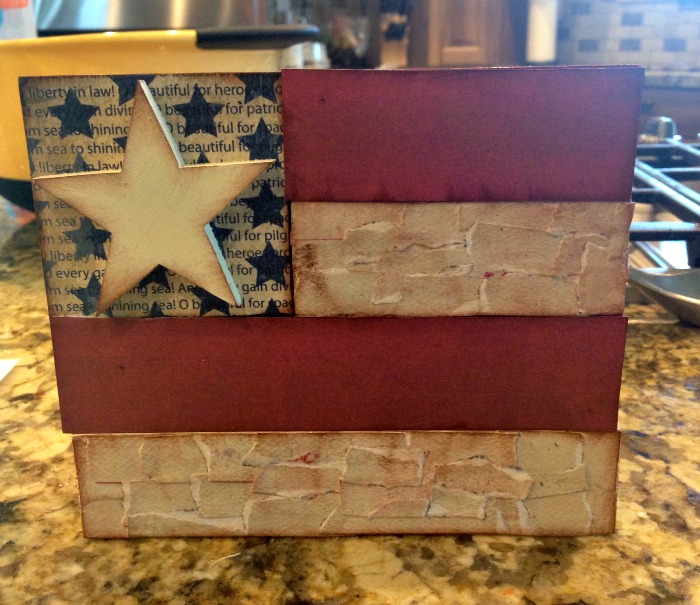
After a little less than an hour, this is what I came up with and I am a little proud if I do say so myself!

Friends, this is seriously the easiest thing ever! Nap time works great for this craft especially since all you need to do it cover it in paper because it is already cut out.
Supplies Needed:
1 flag from Wood Connection (or cut out yourself if you are amazing like that)
1 sheet red scrapbook paper
1 sheet white scrapbook paper
1 sheet of paper for stars
Red Paint
White Paint
Blue Paint
Brown Chalk Pad
Modge Podge
Paint Brushes
I grabbed my paper from The Wood Connection also because I loved what they had and it made it easier to make just one stop instead of what feels like 15.
I did sand my down a little at first to make the paint stick better. That is totally up to you.

Then I painted every other strip red and white and the square blue. I painted all sides but the side I knew my paper would be covering.

After the paint dried, i took my white sheet of paper and tore it up and just started using the Modge Podge and a paint brush to glue it onto the white stripes. I love this tearing method because it gives it some texture and you can't mess it up. It always ends up looking super fun! After the stripes were covered, make sure to Modge Podge over all the paper again to ensure it will stay glued down.

After I was done with the white stripes, I just traced the red stripes and the blue square on the coordinating papers, cut them out and Modge Podged them on.
I painted the star white and when the blue star paper was dry, I just used the Modge Podge to glue the star on to finish the flag.
I liked it at that point but decide I wanted a little more so, I took my chalk pad (Which I LOVE, if you haven't every used one you should because they are awesome)

and just brushed the edges of the stripes and brushed some in the middle of all pieces to add the little bit more that I wanted. Then, I loved it!
I did also end up hot gluing the pieces together so I didn't have to keep reassembling it every time it gets knocked over.
So fun, so easy, and super cute!
Same here, ZERO decorations. This is really cute. This may be the year I have to make something! ;)
ReplyDeleteThat is absolutely adorable. I Love how it came out.
ReplyDeleteI'd love to have that kind of mind, that would figure out these designs!
ReplyDeleteI love this and the white looks perfect and vintage! What a great idea for the 4th!
ReplyDeleteI love the vintage look of this project. I love doing projects with wood, I think they looks so great as part of my decor.
ReplyDeleteThat looks really cool! I'm not really crafty in that sense though. I would like to start working on decoration though, for all holidays. Really lacking in that around here.
ReplyDeleteThis is a cool project. Great outcome!
ReplyDelete