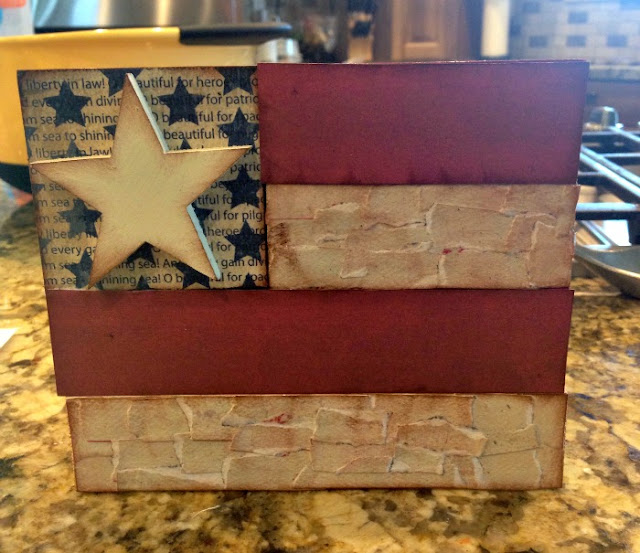
Yes, yes I know that my last post was a tutorial for the 4th of July, but like I said, I don't have anything for this holiday. I'm feeling the need this year to spice up my house and my collection. (I assure you, the hubs is not liking the feeling I'm having.)
I had so much fun with this project. (Mostly) You know those days where you just can't get the itch in your pants to get anything done, then all the sudden, after the kids are in bed and the clock hits 10:30 pm you finally get some kind of energy from somewhere and you stay up way to long? Yeah, that is exactly what happened to me with this project just last night.
So, I got out all my stuff and my husband asked "What the heck are you doing? You are usually getting ready for bed or are in bed sawing logs by this time." All I could say is "I'm not really sure. I just got some kind of energy and I need to feel like I have done something productive today." So, the project began and then I had to finish it because I wanted to see the finished project right then.
It actually wasn't so bad and I liked how it turned out for the most part.
I actually wanted to put "God Bless America" or "Land of the Free" or "America the Beautiful" on it but I just couldn't get it to fit. Oh well, this works for just wanting to get it done!
I just grabbed a pack of these babies from Hobby Lobby, they come in a pack of 4 for $2.99. ( I then used a 40% of coupon which took them down to $1.80. (I think I can handle that!)
I sanded them down a bit to make the paint stick a little better. Then I painted two blue, one red, and one cream. The cream one I turned over and used the back side to paste the paper for the flag on. It was a flat surface and easier to make the flag. But, I wanted the grooves to show on the red and blue ones.
I painted the cream on first so that paint could dry as I was painting the others. While I was waiting for the red and blue ones to dry, I took some paper I grabbed from The Wood Connection traced the block, cut the paper out and Modge Podged it on. I then found some paper that would work for the star part, cut a square and Modge Podged that paper on top of the red and white stripe. I had a little wood star and painted that cream as well and just plopped it down with some Modge Podge onto the star paper. After everything was glued together, I Modge Podged over the top of everything again to make sure it all stuck.
After I got the flag part done, I grabbed my Cricut and cut out the letters using a 1" setting and the paper I used for the flag. (You could also paint them on or use stencils, but no where in my body do I have a steady hand to be able to do that.)
I Modge Podged all the letters on where I wanted them, once again making sure to Modge Podge over the top to ensure it is glued down. Then when everything was dry I took my trusty ink chalk and went around the flag, star, and all the letters to add just a little more to it. (I tell you I love this thing.)

To assemble it, I just hot glued some heavy duty wire on the back of each piece and tied a loop on the top. You will have to use quite a bit of hot glue and make sure you hold it down while it dries or it will just keep popping up. After it was all put together, I didn't like the space of just wire between the loop and the flag so I decided to add some ribbon. (However, the ribbon only came about after what felt like ten hours of trying to get the perfect ribbon bow. That failed. Then tried to get the perfect burlap bow. That failed. So, then I decided to try this with different ribbons.) I just tied the ribbon in knots around the wire, alternating colors, then fixing them at the end to how I wanted. (Make sure you melt the ends with a lighter so they don't fray.)
So, other than a few things that I wanted different, I at least felt a little productive yesterday.
Let me know what you think!


